Showing posts with label Blogger JQuery. Show all posts

Saturday, July 30, 2011

Floating Back To Top Button For Blogger


Add Back To Top Button To Blogger


Step 1. In your dashboard click Design'> Add A Gadget > Choose Html/Javascript from the pop up menu.


Step 2. Copy The Code Below And Paste It Into The Html/Javascript gadget.

<a href='http://thenetfabz.blogspot.com'><img alt='Best Blogger Tips' src='https://blogger.googleusercontent.com/img/b/R29vZ2xl/AVvXsEiIAQcq0TjeGeIYX506m9GQfB8no4Lm6QigHDQnG61ssbWVaTJSy1ONkx0XD7eAYPFDYy_n7CF9sB6i0vM_kkNlmYiVecLmj4QYbLnIJDGeU1GXYf2tYQ3HjY8V8YCuW6BsDZBOl4sMO8cl/s1600/best+blogger+tips.png'/></a><script type="text/JavaScript">
var topMargin = 300
var slideTime = 1200
var ns6 = (!document.all && document.getElementById);
var ie4 = (document.all);
var ns4 = (document.layers);
window.setInterval("main()", 10)

function floatObject() {
if (ns4 || ns6) {
findHt = window.innerHeight;
} else if(ie4) {
findHt = document.body.clientHeight;
}
}

function main() {
if (ns4) {
this.currentY = document.floatLayer.top;
this.scrollTop = window.pageYOffset;
mainTrigger();
} else if(ns6) {
this.currentY = parseInt(document.getElementById('floatLayer').style.top);
this.scrollTop = scrollY;
mainTrigger();
} else if(ie4) {
this.currentY = floatLayer.style.pixelTop;
this.scrollTop = document.body.scrollTop;
mainTrigger();
}

}
function mainTrigger() {
var newTargetY = this.scrollTop + this.topMargin
if ( this.currentY != newTargetY ) {
if ( newTargetY != this.targetY ) {
this.targetY = newTargetY
floatStart();
}
animator();
}


}
function floatStart() {
var now = new Date()
this.A = this.targetY - this.currentY
this.B = Math.PI / ( 2 * this.slideTime )
this.C = now.getTime()
if (Math.abs(this.A) > this.findHt) {
this.D = this.A > 0 ? this.targetY - this.findHt : this.targetY + this.findHt
this.A = this.A > 0 ? this.findHt : -this.findHt
} else {
this.D = this.currentY
}
}
function animator() {
var now = new Date()
var newY = this.A * Math.sin( this.B * ( now.getTime() - this.C ) ) + this.D
newY = Math.round(newY)
if (( this.A > 0 && newY > this.currentY ) || ( this.A < 0 && newY < this.currentY )) {
if ( ie4 )floatLayer.style.pixelTop = newY
if ( ns4 )document.floatLayer.top = newY
if ( ns6 )document.getElementById('floatLayer').style.top = newY + "px"
}
}
//-->
</script>
<div id="floatLayer" style="position: absolute; height:20px; width:15; left:650px; top:400px; z-index: 100"><a href="#"><img vspace="0" border="0" hspace="0" alt="Back to Top" src="https://blogger.googleusercontent.com/img/b/R29vZ2xl/AVvXsEh8ac9b_heUrS5Aq5ZMyeTGec6hrtlXbOeLNmqgYohmPPP17g2dcIx7sTCkVWww56KhmJ0X9Er1jVTMoyRePhh__NOXuaCIJD1Tu6f3oaHXjRlBAzRZShd3OPEf8JBW0Hn_1blf3erinC8x/s1600/TOP+BUTTON.gif" title="Back To Top Of Page" /></a></div><a href="http://spiceupyourblog.com" target="_blank"><small>Blogger Top Gadget</small></a>

Important 

If the button stops in the middle of your page and not at the bottom increase the number in red at the start of the code, for example in the demo i had to set that number to 500.

left:650px; = How far from the left the button appears you can increase and decrease it to suit your blog.

top:400px; = How far from the top it appears.

You can change the image used for the button by changing the image URL in blue to any image you wish to use.

Step 3. Save your template - You can drag and drop the gadget to the bottom of your design page as position wont effect the gadget.

Awesome New Google Search Style Search Bar For Blogger


I'm sure you will have noticed the new Google design as covered in the post Evolving the Google design and experience on the official Google blog.While the changes have been subtle some stand out like the new sleek search bar on results pages.The new search bar has a more modern minimalist look with rounded corners and hover effect.But one new feature i quiet like is as you type your text into the search field an X appears than can be clicked to remove your text.Yes it's nothing major but still a neat feature none the less.So in this post i will show you how you can re-create the new Google search bar and use it on your blog.

Once on your blog it will look the very same, using jQuery for the X delete button and your blogs default search to generate results.This was covered on the Awesome Queness.Com design blog and with just a few changes i have it ready to go For Blogger.


Add The New Google Style Search Bar To Blogger


Remember Always Back Up Your Template Before You Make Change


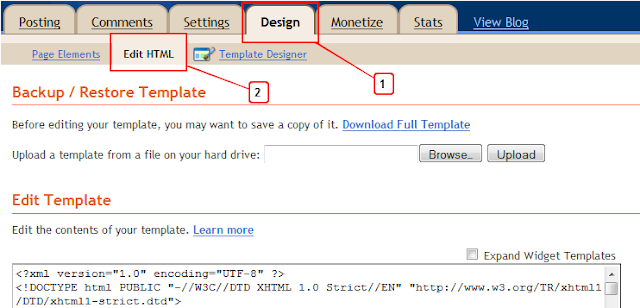
Step 1. In Your Blogger Dashboard Click Design > Edit Html

Design Edit Html Blogger

Step 2. Find the following piece of code in your blogs Html : (Click Ctrl and F for a search bar to help find the code )

]]></b:skin>

Step 3. Copy and Paste the following code Directly Above / Before ]]></b:skin>

-Scroll Box Make Sure To Get All The Code.
/*Start Css For Google Style Search Box*/

/* div container containing the form */
#searchContainer {
margin:20px;
}

/* Style the search input field. */
#field {
float:left;
width:200px;
height:27px;
line-height:27px;
text-indent:10px;
font-family:arial, sans-serif;
font-size:1em;
color:#333;
background: #fff;
border:solid 1px #d9d9d9;
border-top:solid 1px #c0c0c0;
border-right:none;
}

/* Style the "X" text button next to the search input field */
#delete {
float:left;
width:16px;
height:29px;
line-height:27px;
margin-right:15px;
padding:0 10px 0 10px;
font-family: "Lucida Sans", "Lucida Sans Unicode",sans-serif;
font-size:22px;
background: #fff;
border:solid 1px #d9d9d9;
border-top:solid 1px #c0c0c0;
border-left:none;
}
/* Set default state of "X" and hide it */
#delete #x {
color:#A1B9ED;
cursor:pointer;
display:none;
}
/* Set the hover state of "X" */
#delete #x:hover {
color:#36c;
}
/* Syle the search button. Settings of line-height, font-size, text-indent used to hide submit value in IE */
#submit {
cursor:pointer;
width:70px;
height: 31px;
line-height:0;
font-size:0;
text-indent:-999px;
color: transparent;
background: url(https://blogger.googleusercontent.com/img/b/R29vZ2xl/AVvXsEhVqio1r4Jo0ag-iERQwL4hLpA9rEJVpm9e7NvyVWh_sU22foze0p3XJ1qH6dgtbKOrm-BHcIBOBNIlWSYxAHKWybF91lc3DbKvTuiSljQjBiD1LvtFL92oGyj4T_vv09DRNU0_L8PZ6OQm/s1600/ico-search.png) no-repeat #4d90fe center;
border: 1px solid #3079ED;
-moz-border-radius: 2px;
-webkit-border-radius: 2px;
}
/* Style the search button hover state */
#submit:hover {
background: url(https://blogger.googleusercontent.com/img/b/R29vZ2xl/AVvXsEhVqio1r4Jo0ag-iERQwL4hLpA9rEJVpm9e7NvyVWh_sU22foze0p3XJ1qH6dgtbKOrm-BHcIBOBNIlWSYxAHKWybF91lc3DbKvTuiSljQjBiD1LvtFL92oGyj4T_vv09DRNU0_L8PZ6OQm/s1600/ico-search.png) no-repeat center #357AE8;
border: 1px solid #2F5BB7;
}
/* Clear floats */
.fclear {clear:both}

/*End Google Style Search Bar - Info @ http://www.spiceupyourblog.com*/

Note - To change the width of the search bar simply change the line highlighted in Red from 200px up or down.

Step 4. Find the following piece of code in your blogs Html : (Click Ctrl and F for a search bar to help find the code )

</head>

Step 5. Now Copy And Paste This Code Directly Above / Before </head>

Note - If you have previously added jQuery script to your template you can remove the code highlighted in green.

<script src='http://code.jquery.com/jquery-1.6.1.min.js' type='text/javascript'/>
<script type='text/javascript'>
$().ready(function() {
// if text input field value is not empty show the &quot;X&quot; button
$(&quot;#field&quot;).keyup(function() {
$(&quot;#x&quot;).fadeIn();
if ($.trim($(&quot;#field&quot;).val()) == &quot;&quot;) {
$(&quot;#x&quot;).fadeOut();
}
});
// on click of &quot;X&quot;, delete input field value and hide &quot;X&quot;
$(&quot;#x&quot;).click(function() {
$(&quot;#field&quot;).val(&quot;&quot;);
$(this).hide();
});
});
</script>

Step 6. Save your template, we have the Css added to style the search bar and the jQuery for the X button now we add the html.

Step 7. Head back to your blogs design page and click Add A Gadget > Choose Html/Javascript.


Step 8. Copy and Paste the following code into the Html/Javascript gadget :

<div id="searchContainer">
<form name="SUYB" action="/search" method="get">
<input type="text" id="field" id="s" name="q"/>
<div id="delete"><span id="x">x</span></div>
<input type="submit" name="submit" id="submit" value="Search" />
</form>
</div>

Step 9. Save the html/javascript gadget and you can drag and drop it into place.

How To Use Images For List Bullet Points On Your Blog


Images As Bullet Points In ListsAdd Image Bullet Points To Your Blog

For Wordpress or other platforms paste the Css code in your style sheet and add the class to the list html in the same way.

Add The Css To Blogger

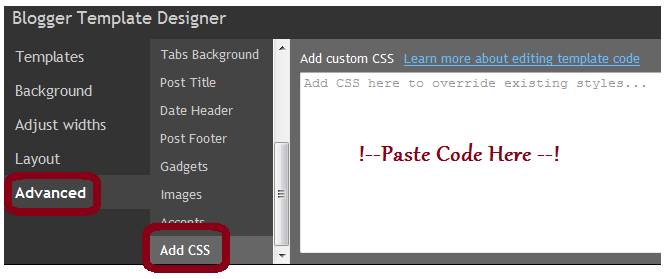
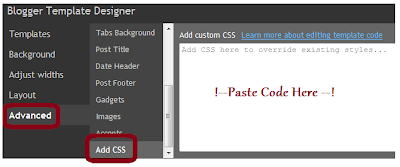
Step 1. Copy the Css code below for the Bullet Image you want to use from below.On Blogger you add it via the template designer by going to Design > Template Designer > Advanced > Add Css as shown below, remember to click apply to blog to save.


Use Your Own Image - Replace IMAGE-URL-HERE with an image around 12x12px.

ul.imglist {
margin: 0;
padding: 0;
}
ul.imglist li {
margin: 0;
list-style-image:url('IMAGE-URL-HERE');
}

Ready To Use Images - These have the image shown already included.

Green Tic Bullet 1


ul.imglist {
margin: 0;
padding: 0;
}
ul.imglist li {
margin: 0;
list-style-image:url('https://blogger.googleusercontent.com/img/b/R29vZ2xl/AVvXsEhuT4gRQQXRcLpDkjjKha7MpZbLFiIW9wbsHdhCQfSE2ks5TtxxzAKW9shBdXfu1i-yctuG9y2PuZ9uVQEkYEF3ODA4sEjkzuBwnH-gp_ZQaGQceuRzr2pl3Kz2wSQv0DfkaL6o5fcokT-d/s1600/bullet-point-green-tick.png');
}

Green Tick Bullet 2.


ul.imglist {
margin: 0;
padding: 0;
}
ul.imglist li {
margin: 0;
list-style-image:url('https://blogger.googleusercontent.com/img/b/R29vZ2xl/AVvXsEi4Qk2iPsTX-4amidAFC8YOhxiyrqofKuv8ImKQmrPE-Q3B-u-lC2ouglAaK7tL0vuJmVdEt8Lo2wEjw1kHKcRsHvm7oRW59Krsga4o3rGPx9Z7iEL_a25uh3d_UDyfJuCOR_xuoKV17E25/s1600/bullet-point-image-6.gif');
}

Maroon Arrow Bullet Point


ul.imglist {
margin: 0;
padding: 0;
}
ul.imglist li {
margin: 0;
list-style-image:url('https://blogger.googleusercontent.com/img/b/R29vZ2xl/AVvXsEhCRRLRJRSuS6xfXKvVYovV_z_fKzWaIErZbiFfnR88LqFrvrCi5su8lmHrD1hf-Qn847VBPcbZA7UwwmXJNdwpAHDXY6xdZtPnZlcC4n3WQczdmPM4KpUwIup9ZIjZ9doZI84skysx_V3X/s1600/bullet-point-image-1.png');
}

Flower Bullet Point


ul.imglist {
margin: 0;
padding: 0;
}
ul.imglist li {
margin: 0;
list-style-image:url('https://blogger.googleusercontent.com/img/b/R29vZ2xl/AVvXsEhC10QYlb1_uqLXyWscDI6wnXsguIoOePhyBdACfPRUj-cfJJ-WCAvR1Va3DMakeein2zjeWRfgmsEJ8Z8VN_TcbH5n7ZkGxxZ4zAqquUux5UbYqK7PEf3r8SLjaXUzSMbVYuyscyPmxGcX/s1600/bullet-point-image-4.jpg');
}

Orange Double Arrow Bullet Point


ul.imglist {
margin: 0;
padding: 0;
}
ul.imglist li {
margin: 0;
list-style-image:url('https://blogger.googleusercontent.com/img/b/R29vZ2xl/AVvXsEh3PDJIsbQXZYJVFhndVzaA9SG3EWjgVn9DWFw_yy24GaSqkW6BisFKvfBwA8sTN5tOZ0HS6rvTpz-EgBroet5rvAso0KbRe6eu1O2sSciWctPR0LCU3EVTrYa9qW_K67XTBTnbKxA2Nuya/s1600/bullet-point-image-5.gif');
}

Yellow Tick Bullet Point


ul.imglist {
margin: 0;
padding: 0;
}
ul.imglist li {
margin: 0;
list-style-image:url('https://blogger.googleusercontent.com/img/b/R29vZ2xl/AVvXsEi4Qk2iPsTX-4amidAFC8YOhxiyrqofKuv8ImKQmrPE-Q3B-u-lC2ouglAaK7tL0vuJmVdEt8Lo2wEjw1kHKcRsHvm7oRW59Krsga4o3rGPx9Z7iEL_a25uh3d_UDyfJuCOR_xuoKV17E25/s1600/bullet-point-image-6.gif');
}

Blue Plus Bullet point


ul.imglist {
margin: 0;
padding: 0;
}
ul.imglist li {
margin: 0;
list-style-image:url('https://blogger.googleusercontent.com/img/b/R29vZ2xl/AVvXsEgpjT1jbowSZ8WzUApkSbZiNW7-PeWwo9Ze3_OtZZ0yqixVaS6_Ly8JSZ4Fa125jqNwv69_lo3stHyQvMg-4UBIWZAa2dEPjle0aPd13XZNCT5DC7w3pAdXaI94G8273WAH4epRq1o81hyphenhyphen1/s1600/bullet-point-image-8.png');
}

Orange Dimond Bullet Point


ul.imglist {
margin: 0;
padding: 0;
}
ul.imglist li {
margin: 0;
list-style-image:url('https://blogger.googleusercontent.com/img/b/R29vZ2xl/AVvXsEj0Opvqbny7zRKYI0zzYhLqAPi7BE0AfqgkgNdUeLH0dbCrr79SpQamZKZrRqhwmTJHzyyt0AFCopIyqDeYFIwGGkEZmenWpjzCnAqw-xCzLMDb73tMqV6Qtm3yZCulJnWVaQcRzrPm4pqi/s1600/bullet-point-image-9.gif');
}

Double Bullet Point


ul.imglist {
margin: 0;
padding: 0;
}
ul.imglist li {
margin: 0;
list-style-image:url('https://blogger.googleusercontent.com/img/b/R29vZ2xl/AVvXsEhmLfbhoJSI9w0l7fjQJpInUA-lLE8WFNiZeZgRwYDD8vjfDYdsFPzIwgWUPyhnQkNCDiEtf75Fz5yw2gTEmq6hyphenhyphenAxPZqKFgWACx7iJjZ-6BQC7eAW32q0Nr-Q1hoZ2IpUlr-377-SLk5pM/s1600/bullet-point-image-10.gif');
}

Simple Circle Bullet Point


ul.imglist {
margin: 0;
padding: 0;
}
ul.imglist li {
margin: 0;
list-style-image:url('https://blogger.googleusercontent.com/img/b/R29vZ2xl/AVvXsEi3jd7UOMtRi1iqKtGdbidPJHyFkD9b02teayvjtWjWVbunKZS_Rn3eP8cmJIEwCTS-xzUAJJUAEB9LOqxPcVhGpQlA9hT04Ze1ZTxkmrDM0HoHW9qBV7umn4fCjRTJBjNor8DgdMCxoGDA/s1600/circle-bullet-point-image.png');
}

Thats the Css, We now have to add a class to the lists we want to use images on.

When you create an unordered list this is the code you use :

<ul>
<li>Item One</li>
<li>Item Two</li>
</ul>

We simply add class='imglist' to the ul tag like this :

<ul class="imglist">
<li>Item One</li>
<li>Item Two</li>
</ul>

Host your Image on Blogger for Free with Unlimited Bandwidth

Hosting your Images on Blogger with Unlimited Bandwidth for Free!. There are so many Free image hosting sites online.Some of the most popular sites include Imageshack, Photobucket, Tinypic, Flicker, Picasa, etc.. But they all have Limited Features, Like a Limited number of uploads, Image size Limits, Less Speed and especially bandwidth limits. Here, we are on the blogger platform, Blogger give free image hosting with unlimited bandwidth. All we need to know is how to upload the images to blogger.But some Bloggers are facing problems while getting the hotlink image URL to their images.This tutorial covers image uploads and will also be useful for some of my upcoming Great Tutorials.


How to Host your Image on Blogger?

Step 1: Login to Blogger Dashboard > Click on NEWPOST button
Step 2: Click the Compose tab --> Click on Insert Image icon()
Step 3: Click the Choose Files button
Step 4: Select the Files and Click the Open Button
Wait for a while till the image is finished uploading.
Step 5: Select the Uploaded image and Click the Add Selected button.
Step 6: Click on the Edit HTML tab
Step 7: you will see the two image Urls, but u pick Original image Url after the href tag.

Use the image any where you want with unlimited bandwidth.
If you upload the two or more images at once you will get the urls after the href tag, but make sure the image name is different!
This is a small tutorial about Blogger images upload and in upcoming tutorial i will give you the Most wanted tips and tricks about blogger images, those are very simple and every Blogger should must know it.

The New Share This Bookmarking Buttons With Share Count For Blogger

Share This is a very popular service offering multiple
Social Bookmarking Widgets for blogs and websites.The green Share This icon is a familiar sight on many of the top blogs opening up a wide range of options for readers to Bookmark and share the content.In this post i have a Blogger Tip show you how to add the new Share This 'Oath' Counter Buttons to various positions on your blog.You can see the buttons in question to the top of this paragraph and that position will be one of the options for your blog.

To generate the buttons you will need to go to the Share This website and use their very easy generator process.

Add The New Share This Counter Buttons To Your Blog


Add The Share This Script


When you have chosen your buttons you will be presented with two snippets of code.The top snippet is for the actual buttons and we will need that later now we will add the second snippet of code to your template.This code only needs to be added once and will allow all the buttons to work.

Step 1. In your Blogger dashboard click Design > Edit Html

Step 2. Find the following piece of code in your blogs Html : (Click Ctrl and F for a search bar to help find the code )

</head>

Step 3. Copy and paste the second snippet of code from Share This directly above </head> then save your template.

That's the script added, how easy was that.

Add The Counter Buttons Buttons To Your Blog


So i will show you how to add the buttons to various positions on your blog.Namely horizontally above your posts (Below the post title), Vertically At the top of your posts wrapped in text and horizontally below your posts.You can also add them to a Html/Javascript gadget in your sidebar.

For all positions you need to go your your blogs html, that's Design > Edit Html > and tick the Expand widget templates box.

Horizontally Above Posts


Find This Code and paste the button code directly below it, save and that's it !

<div class='post-header-line-1'/>

Horizontally Below Posts


Find this code and paste the code below it, save and once again that's it !

<div class='post-footer'>

Wrapped In Text At The Top Left Or Right Of Posts


For this there is a little extra work, we need to set the buttons to sit on the left or right and we need them to be vertical.To do this i have added code to put them on the left, you will also need to add the line break tag between each button.

To add the line break you add <br/> between the code for each button.So in your button code after every instance of </span> you add <br/> to look like the example below :

<span class='st_twitter_hcount' displayText='Tweet'></span><br/><span class='st_facebook_hcount' displayText='Facebook'></span><br/><span class='st_friendfeed_hcount' displayText='FriendFeed'></span><br/><span class='st_blogger_hcount' displayText='Blogger'></span><br/><span class='st_sharethis_hcount' displayText='ShareThis'></span><br/>

First we find the position in your template for your buttons, once again we are clicking Design > Edit Html > And Tick The Expand Widget Templates Box.

Find the following code in your blogs Html :

<data:post.body/>

Next we add the following code directly Above <data:post.body/>

<div style="float: left; margin-right:5px;">


! Button Code Here !


</div>

-Replace ! Button Code Here ! with the code for your buttons.
-To have the buttons on the right change left and right to right and left.

Monday, July 25, 2011

jQuery Fade In Scroll To Top Button With Smooth Scroll For Blogger

jQuery smooth scroll to topA Floating back to top button.Since then i have wanted to cover a more up to date back to top modern button.The popular option when it comes to scroll top buttons is to use jQuery for two reasons.Firstly with jQuery you can have the button hidden until the page is scrolled, secondly when clicked the page scrolls smoothly to the top instead of the direct jump a regular link would have.So that's exactly what i have in this tutorial.We will add a button that will only be visible when the reader starts scrolling and then when they click it the page slowly scrolls up easing into position at the top.For the button itself we us a sprite to create a hover effect sprites also keep the page load time down.
 

Smooth Scroll jQuery Back To Top button


Remember Always Back Up Your Template Before You Make Changes - How To Back Up A Blogger Template

Step 1. In Your Blogger Dashboard Click Design > Edit Html

Design Edit Html Blogger

Step 2. Find the following piece of code in your blogs Html : (Click Ctrl and F for a search bar to help find the code )

]]></b:skin>

Step 3. Copy and Paste the following code Directly Above / Before ]]></b:skin>


#toTop {
display:none;
text-decoration:none;
position:fixed;
bottom:10px;
right:10px;
overflow:hidden;
width:51px;
height:51px;
border:none;
text-indent:-999px;
background:url(https://blogger.googleusercontent.com/img/b/R29vZ2xl/AVvXsEg92jQwzClMdAEVW0krpQ4kj9TK06fOTlh6_Lz5zoeSrwku8PtzPjFJuxljxtPxLcj-AzlkHLbxWw0GwQY8DSvWpBBXQq4y2EQHtSXI0Ii5bvZm2MrgeUCjEHRe9Qe9ZnOeAedeyisuWzY/s1600/ui.totop.png) no-repeat left top;
}
#toTopHover {
background:url(https://blogger.googleusercontent.com/img/b/R29vZ2xl/AVvXsEg92jQwzClMdAEVW0krpQ4kj9TK06fOTlh6_Lz5zoeSrwku8PtzPjFJuxljxtPxLcj-AzlkHLbxWw0GwQY8DSvWpBBXQq4y2EQHtSXI0Ii5bvZm2MrgeUCjEHRe9Qe9ZnOeAedeyisuWzY/s1600/ui.totop.png) no-repeat left -51px;
width:51px;
height:51px;
display:block;
overflow:hidden;
float:left;
opacity: 0;
-moz-opacity: 0;
filter:alpha(opacity=0);
}
#toTop:active, #toTop:focus {
outline:none;
}

Note - To move the button to the left of your blog change right:10px; to left:10px; .

Step 4. Find the following piece of code in your blogs Html : (Click Ctrl and F for a search bar to help find the code - How To Find Code In Blogger Template Template)

</head>

Step 5. Now Copy And Paste This Code Directly Above / Before </head>

Note - If you have previously added jQuery script to your template you can leave out the line in green.
<script src='http://code.jquery.com/jquery-1.6.1.min.js' type='text/javascript'/>
<script src='http://spiceupyourblogextras.googlecode.com/files/easing.js' type='text/javascript'/>
<script src='http://spiceupyourblogextras.googlecode.com/files/jquery.ui.totop.js' type='text/javascript'/>
<script type='text/javascript'>
$(document).ready(function() {
/*
var defaults = {
containerID: &#39;moccaUItoTop&#39;, // fading element id
containerHoverClass: &#39;moccaUIhover&#39;, // fading element hover class
scrollSpeed: 1200,
easingType: &#39;linear&#39;
};
*/

$().UItoTop({ easingType: &#39;easeOutQuart&#39; });

});
</script>

Step 6. Save your template.

That's it, You can check out your new back to top button after you Comment on and Share this post ! Make sure to check out more of our Blogger Tips.

Saturday, July 23, 2011

Speedup Blogger with Lazy Load Script

Well speeding up website on blogger or anywhere means decreasing scripts used on blogger or any other images used so that it don’t have load that much right @ the startup but know you can add a Lazy Load Script which will automatically load images after your other items has been loaded has making them when you scroll than they load which makes blogs much faster.

Follow the below steps to embed Lazy Load Script in Blogger :

1. You need to go to www.Blogger.com 
2. Sign in with your Blogger account
3. Go to Dashboard than Design
4. Open Edit HTML
5. Click download template so that you have a backup for that template.
6. Now click ctrl + f to open the search feature
7. Search for </body> tag
8. Now paste the below <script> right above </body> tag.

<script src='http://ajax.googleapis.com/ajax/libs/jquery/1.4.2/jquery.min.js?ver=1.4.2' type='text/javascript'/>
<script src='
https://sites.google.com/site/merciblogger/jquery.lazyload.mini.js' type='text/javascript'/>
<script type='text/javascript'>
jQuery(document).ready(function($){
if (navigator.platform == &quot;iPad&quot;) return;
jQuery(&#39;img&#39;).lazyload({
effect:&quot;fadeIn&quot;,
placeholder: &quot;
https://blogger.googleusercontent.com/img/b/R29vZ2xl/AVvXsEg2Wh8RzYT46B4rBcYT3imKRWNzc7hoLfhW76Zhgep_ZrP9JbEzMfTtgYbgFxKPravS9dO7h9yyGbW_bS-pozmOJkVDLtXRN8ywL1oWb3uCX3gSXLqlXlU4d32pzPTT7AFnMgjHmhx84-o/&quot;
});
});
</script>


9. After pasting just click Save Template and check your Blogger Blog ii will some stamina in it for the faster loading. Try it out if you are not satisfied than juts remove this script and save template again.

Wednesday, July 20, 2011

Adding Simple Stylish Css Captions To Images On Blogger

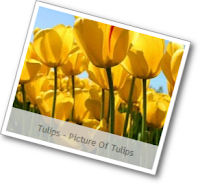
In this blog tip we will look at a quiet simple way to add captions or descriptions to the images used on your blog.On Blogger there is an option when you click on an image uploaded to the post editor to add a caption.This adds the caption below the picture using a table.However with just a few lines of Css we can have the caption across the bottom on top of the image with an neat opacity background.You can also change the colors of the caption to suit your blogs design, You can see some examples in the demo below.

Adding Css Captions To Images On Blogger


Step 1. In your Blogger dashboard click Design > Template Designer > Advanced > Add Css :


Step 2. Copy and Paste the following code into the section provided :

.imgcaption {
padding-bottom:10px;
padding-top:30px;
position:relative;
}
.imgcaption cap {
position:absolute;
left:0%;
right:0%;
padding:10px;
background:#dddddd;
color:ffffff;
opacity:0.8 !important;
bottom:6%;
}

Note - You can change the background and font color the caption by changing the color code highlighted in green - Color Code Generator.

Step 3. Click 'Apply To Blog' in the top right corner.

That's the css added now you just need to add tags to the images you want to have a caption.

In the image below you can see in yellow the div tag added and closed and in red the caption added in 'cap' tags.

<div class="imgcaption"><a href="https://blogger.googleusercontent.com/img/b/R29vZ2xl/AVvXsEimyBzdBq8vRreTjRpMuNYtaEZLTGkoL0J5xjX1bJZOlrUxk3fDlEJmkrVhBcYA1Sp1hCN7637u5hS9lSreq8BMvMuV6-aaZMO7KP_vW72fhmLY7PD-vlG0O5JrRKrDOBVV649avB-qXWKi/s1600/Desert.jpg"><img src="https://blogger.googleusercontent.com/img/b/R29vZ2xl/AVvXsEimyBzdBq8vRreTjRpMuNYtaEZLTGkoL0J5xjX1bJZOlrUxk3fDlEJmkrVhBcYA1Sp1hCN7637u5hS9lSreq8BMvMuV6-aaZMO7KP_vW72fhmLY7PD-vlG0O5JrRKrDOBVV649avB-qXWKi/s320/Desert.jpg"/></a><cap>Desert - Picture Of The Desert</cap></div>

Images uploaded to Blogger already have class="separator" so we just change change separator to imgcaption.Then we add the actual caption as shown in red.

From This :

<div class="separator" style="clear: both; text-align: center;">
<a href="https://blogger.googleusercontent.com/img/b/R29vZ2xl/AVvXsEiM8WaO_P2POsWvZb6sVzT-xJ6vDf3lt4Mo2WSFx97JIfNunymwsOJxZjybPfPbcMP2i0OqhVFfzhPmVE0oZmG8SarAOPqehyphenhyphenz917PHsCMfrMtvNos48W0CP9u18J3VBlSi9k1LTOyTHaOa/s1600/Lighthouse.jpg" imageanchor="1" style="margin-left: 1em; margin-right: 1em;"><img border="0" height="240" src="https://blogger.googleusercontent.com/img/b/R29vZ2xl/AVvXsEiM8WaO_P2POsWvZb6sVzT-xJ6vDf3lt4Mo2WSFx97JIfNunymwsOJxZjybPfPbcMP2i0OqhVFfzhPmVE0oZmG8SarAOPqehyphenhyphenz917PHsCMfrMtvNos48W0CP9u18J3VBlSi9k1LTOyTHaOa/s320/Lighthouse.jpg" width="320" /></a>

To This

<div class="imgcaption" style="clear: both; text-align: center;">
<a href="https://blogger.googleusercontent.com/img/b/R29vZ2xl/AVvXsEiM8WaO_P2POsWvZb6sVzT-xJ6vDf3lt4Mo2WSFx97JIfNunymwsOJxZjybPfPbcMP2i0OqhVFfzhPmVE0oZmG8SarAOPqehyphenhyphenz917PHsCMfrMtvNos48W0CP9u18J3VBlSi9k1LTOyTHaOa/s1600/Lighthouse.jpg" imageanchor="1" style="margin-left: 1em; margin-right: 1em;"><img border="0" height="240" src="https://blogger.googleusercontent.com/img/b/R29vZ2xl/AVvXsEiM8WaO_P2POsWvZb6sVzT-xJ6vDf3lt4Mo2WSFx97JIfNunymwsOJxZjybPfPbcMP2i0OqhVFfzhPmVE0oZmG8SarAOPqehyphenhyphenz917PHsCMfrMtvNos48W0CP9u18J3VBlSi9k1LTOyTHaOa/s320/Lighthouse.jpg" width="320" /></a><cap>Lighthouse - Picture Of A Lighthouse</cap></div>

Thanks it a simple blog tip for captions on images.

Thursday, June 23, 2011

How to Disable Right click in Blogger / Blogspot ?

Have you noticed, that some web sites do not allow their visitors using right mouse click while pointer is on the blog area. This option is useful for the site and blog owners, who want to minimize the possibilities of the content direct copying to other posts.

Right click on any internet browser is very important element and we must use it when it comes to copy or editing texts and etc. It’s very important when it comes to webmasters too. but some people may use it in a bad way, and you may want to make click right disabled on your blog. to protect you text, images links and etc.


To setup this tool in your blog Copy the Following code and paste it to your blog by adding a new page element.


Step 1 : Go to Dashboard > Layout > Add Gadget > HTML / JavaScript.


Step 2 : Copy the following code and paste it there .


<script type='text/javascript'>

<!--

//Disable right click script
//visit TheNetFABz
var message="Sorry, right-click has been disabled";
///////////////////////////////////
function clickIE() {if (document.all) {(message);return false;}}
function clickNS(e) {if
(document.layers||(document.getElementById&&!document.all)) {
if (e.which==2||e.which==3) {(message);return false;}}}
if (document.layers)
{document.captureEvents(Event.MOUSEDOWN);document.onmousedown=clickNS;}
else{document.onmouseup=clickNS;document.oncontextmenu=clickIE;}
document.oncontextmenu=new Function("return false")
// -->
</script>
Step 3 : Save the html/javascript and view you blog.
When you will try to do right click, a message will tell you that “Function disabled” , and if you want to change this words” Function Disabled” Then simply find it in code and replace it.

Wednesday, June 22, 2011

A Cool Any Size jQuery Powered Featured Posts Slider For Blogger

Over the last few weeks i have published some cool jQuery Gadgets and Widgets for your Blogs.In this post i have taken the jQuery Easy Slider, a stylish slide show with some neat options and turned it into a kinda mini slider with the option to go large.We previously published the Blogger jQuery Anything Slider that had the option to add videos or images as slides and a Simple But Stylish Blogger Featured Posts Slider.So i wanted to continue with a slide show that could be easily re sized from spanning the width of your blog to the miniature example i have here.

This jQuery Featured Posts Slider also has features like auto scroll, continues scroll plus next slide and previous slide buttons for manual scroll

Add The Any Size jQuery Slider To Blogger


Remember Always Back Up Your Template Before You Make Changes

Step 1. In Your Blogger Dashboard Click Design > Edit Html

Design Edit Html Blogger


Step 2. Find the following piece of code in your blogs Html : (Click Ctrl and F for a search bar to help find the code )

]]></b:skin>

Step 3. Copy and Paste the following code Directly Above / Before ]]></b:skin>

/*Slider Css*/
#slider{}
#slider ul, #slider li{
margin:0;
padding:0;
list-style:none;
}
#slider li{
width:320px;
height:111px;
overflow:hidden;
}
#prevBtn, #nextBtn{
display:block;
width:30px;
height:77px;
position:absolute;
left:-30px;
top:15px;
}
#nextBtn{
left:320px;
}
#prevBtn a, #nextBtn a{
display:block;
width:30px;
height:77px;
background:url(https://blogger.googleusercontent.com/img/b/R29vZ2xl/AVvXsEg9iFxn_KnIqv2RnNviWPj8KbmvDu79G2Kgd7_2ffBVh-O0DhgUmYfex2VcVX7FBAKp2Ek8YYCD5CLxEt0dwzYsm0UyN_D-IAjamhllkv8MU5qBdcY-uoeF0fa-0Uj7FrQD0YXxB8ngxQM/s1600/btn_prev.gif) no-repeat 0 0;
}
#nextBtn a{
background:url(https://blogger.googleusercontent.com/img/b/R29vZ2xl/AVvXsEiGbbuuDb73zbtRXPRwTtSS2A4S0jYIpuUnkV-ffIO2SHmS85rEG7YmHukSv1tqqyBLB8RJnyUpricSIQCE5bV1QxM7xuzy01_sezmyHb0p-DYhgafdNxNqQ7Ye9rGvo7myW38NN2sQ3Qs/s1600/btn_next.gif) no-repeat 0 0;
}
/*Slider Css Info @ http://thenetfabz.blogspot.com*/


Change the size of the slider - The width and height are highlighted in yellow so you change these to your required dimensions.You will also have to change the position of the next and previous buttons which is a little more tricky.

Highlighted in red you can see i have the buttons 15px from the top, if you made the slider bigger you would increase the margin from the top.So for example if you made the slider 222px high you would make this 30px.You can try a few margins until you get it right.

Step 4. Find the following piece of code in your blogs Html : (Click Ctrl and F for a search bar to help find the code )

</head>

Step 5. Now Copy And Paste This Code Directly Above / Before </head>

Note - If you have previously added jQuery to your template you can leave out the section in green.
<script src='https://ajax.googleapis.com/ajax/libs/jquery/1.6.1/jquery.min.js' type='text/javascript'/>
<script src='http://spiceupyourblogextras.googlecode.com/files/suyb-easyslider-blogger-v3.js'/>
<script>
$(document).ready(function(){
$(&quot;#slider&quot;).easySlider({
auto: true,
continuous: true
});
});
</script>

That's the Css and Script added for the slider now we add the Html for the actual images.

The Html, Links And Images


This is the html for the actual slider in the demo blog, you can see the links and images highlighted.You can copy and paste this code into a Html / Javascript gadget from your design page, add your links then save and drag and drop into position.


<div id="slider"> <ul>

<li><a href= "http://thenetfabz.blogspot.com"><img src="https://blogger.googleusercontent.com/img/b/R29vZ2xl/AVvXsEgrwOMXPaO8D0Gk_DfrL1CzAVpB7Ap1sqH4R-397_CQtcuETMIRyxtxZLQu5HMKdHz7na_sMH8pgTEj8Xkg3cbE_w5kAonu25FNShCXRtfRXD4yy-U5eWrqi2rSJT2GOINm2HxZywluS38/s320/01.jpg" width="320px" height="111px" /></a></li>

<li><a href="http://thenetfabz.blogspot.com"><img src="https://blogger.googleusercontent.com/img/b/R29vZ2xl/AVvXsEh-iEGLVpT9-H3kHC7H0jCQj_CDVdHQMz4iGJ9NJtUmKcN3gaN2MTcJVpZnvpUs3_cNG7pGKB3Cp_PSMjN_DzXWK61coek_93vX_6D-YE58JM-HF7Bbr_FpbuLLBZ_UpPJXMW06xWxIwJo/s320/02.jpg" width="320px" height="111px"/></a></li>

<li><a href="http://thenetfabz.blogspot.com"><img src="https://blogger.googleusercontent.com/img/b/R29vZ2xl/AVvXsEgZDphK6tv2LcPJx7enmmNRsiWhVd-FyWWTy3psmUsf25ANM76S9DYKgpzjin03eR5eqX08HItgAPVhFDME8Ju-mh9eRNz7JCaVI71AUbjDj1lIifDVII1dKvhaEi-ob8nfaaLJiheClPM/s320/03.jpg" width="320px" height="111px" /></a></li>

<li> <a href="http://thenetfabz.blogspot.com"><img src="https://blogger.googleusercontent.com/img/b/R29vZ2xl/AVvXsEjtjbJVfkreO1iN73gCStiNNJLSdF7b8qAfNYQqUiv8-svZugNNuVRpkdvBO3N2nqbz4FG2Z96lJh69EZwLVCI7RmK4_JYy1gVytlpG9x2TRkqKeD7lxejR8Z-hi4l1KnJc2Fuw4TRqvvQ/s320/04.jpg" width="320px" height="111px" /></a></li>

<li><a href="http://thenetfabz.blogspot.com"><img src="https://blogger.googleusercontent.com/img/b/R29vZ2xl/AVvXsEia3K74pZKm_1TepPdNRCFiWtsk1dqoUc2V3UscagRI0FwlSqV4IJ5otOj_K_XV3iizUsnpZT-cuurv13EZIc5mJ8hXET57XJBKa37Qx2pVchPaI3yDNGuwPjmqcQis7a9Slkmn-v51aec/s320/05.jpg" width="320px" height="111px" /></a></li>

</ul>
</div>


Note - The links are in yellow and the image URLs in red, change these to your links and images.

Note 1 - If you do change the size of the slider you need to change the width and height in each slide above to the same dimensions.

Add More Slides - To add more slides you simply add another link and image like this after the <ul> tag above :


<li><a href="http://thenetfabz.blogspot.com"><img src="https://blogger.googleusercontent.com/img/b/R29vZ2xl/AVvXsEia3K74pZKm_1TepPdNRCFiWtsk1dqoUc2V3UscagRI0FwlSqV4IJ5otOj_K_XV3iizUsnpZT-cuurv13EZIc5mJ8hXET57XJBKa37Qx2pVchPaI3yDNGuwPjmqcQis7a9Slkmn-v51aec/s320/05.jpg" width="320px" height="111px" /></a></li>


That's it for the versatile jQuery Easy Slider and this Blogger Tip.And make sure to check out more of our jQuery Gadgets
HackingUniversity - Hacks • Pranks • Tricks • How-Tos.